
Writer Kristin Caliendo tries out the latest DIY trend
Getting Crafty 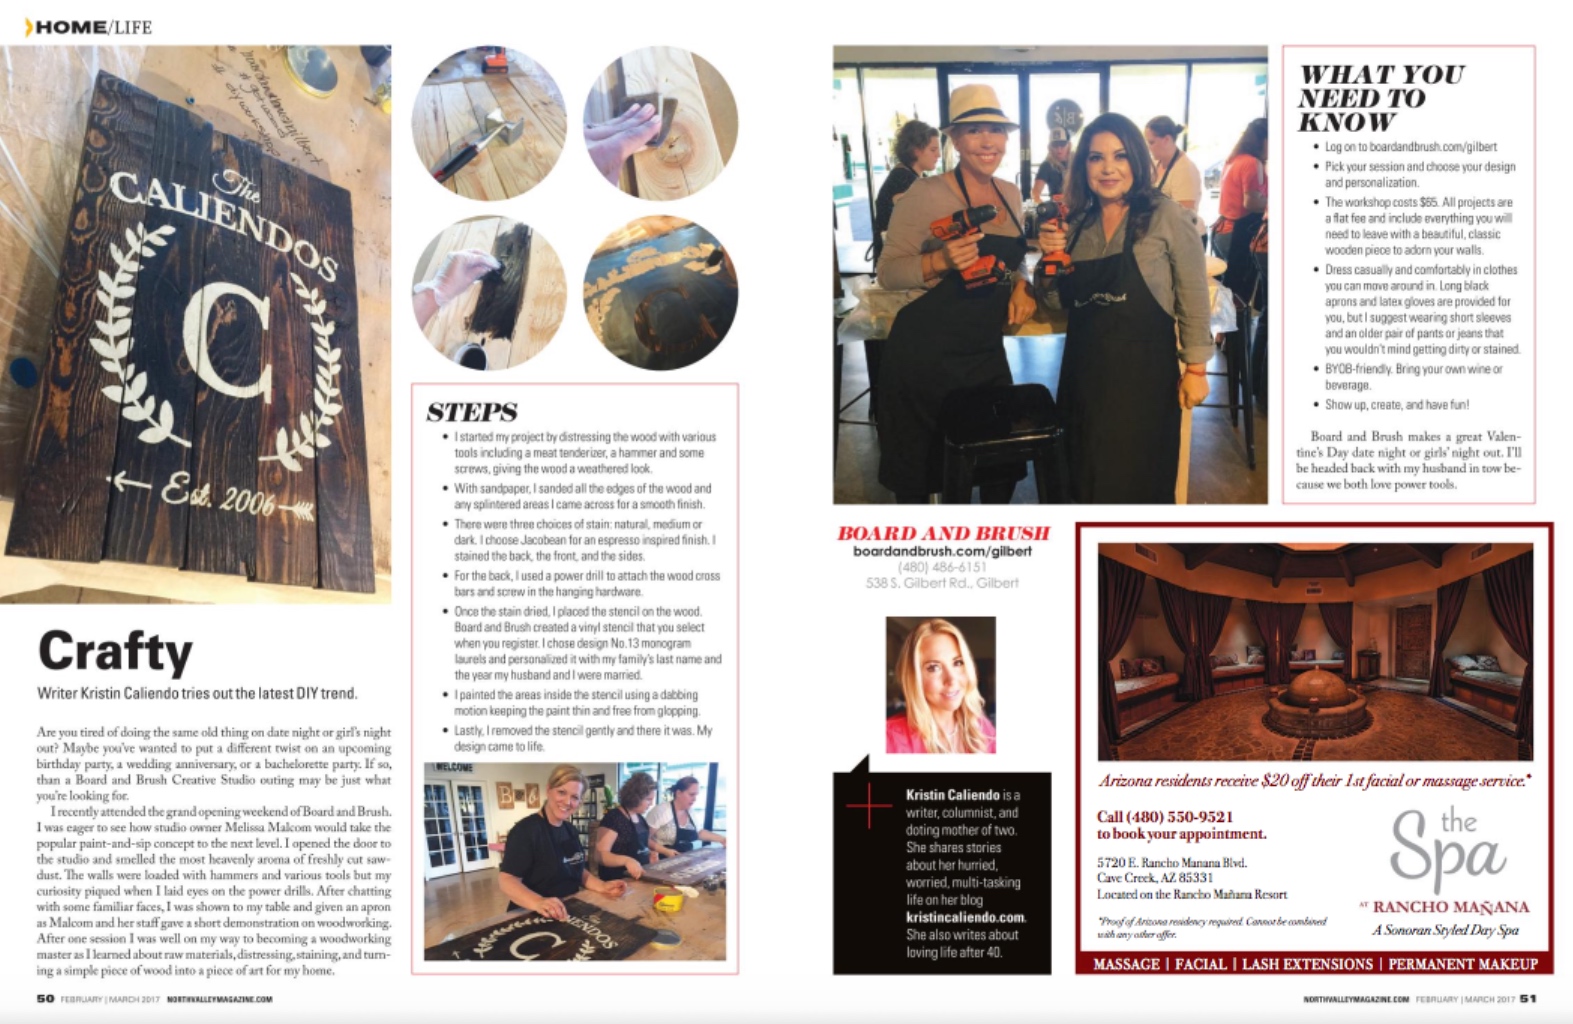
Writer Kristin Caliendo tries out the latest DIY trend.
Are you tired of doing the same old thing on date night or girl’s night out? Maybe you’ve wanted to put a different twist on an upcoming birthday party, a wedding anniversary, or a bachelorette party. If so, than a Board and Brush Creative Studio outing may be just what you’re looking for.
I recently attended the grand opening weekend of Board and Brush. I was eager to see how studio owner Melissa Malcom would take the popular paint-and-sip concept to the next level. I opened the door to the studio and smelled the most heavenly aroma of freshly cut sawdust. The walls were loaded with hammers and various tools but my curiosity piqued when I laid eyes on the power drills. After chatting with some familiar faces, I was shown to my table and given an apron as Malcom and her staff gave a short demonstration on woodworking. After one session I was well on my way to becoming a woodworking master as I learned about raw materials, distressing, staining, and turning a simple piece of wood into a piece of art for my home.
Steps
- I started my project by distressing the wood with various tools including a meat tenderizer, a hammer and some screws, giving the wood a weathered look.
- With sandpaper, I sanded all the edges of the wood and any splintered areas I came across for a smooth finish.
- There were three choices of stain: natural, medium or dark. I choose Jacobean for an espresso inspired finish. I stained the back, the front, and the sides.
- For the back, I used a power drill to attach the wood cross bars and screw in the hanging hardware.
- Once the stain dried, I placed the stencil on the wood. Board and Brush created a vinyl stencil that you select when you register. I chose design 13 monogram laurels and personalized it with my family’s last name and the year my husband and I were married.
- I painted the areas inside the stencil using a dabbing motion keeping the paint thin and free from glopping.
- Lastly, I removed the stencil gently and there it was. My design came to life.
What You Need to Know
- Log on to boardandbrush.com/gilbert
- Pick your session and choose your design and personalization.
- The workshop costs $65. All projects are a flat fee and include everything you will need to leave with a beautiful, classic wooden piece to adorn your walls.
- Dress casually and comfortably in clothes you can move around in. Long black aprons and latex gloves are provided for you, but I suggest wearing short sleeves and an older pair of pants or jeans that you wouldn’t mind getting dirty or stained.
- BYOB-friendly. Bring your own wine or beverage.
- Show up, create, and have fun!
Board and Brush makes a great Valentine’s Day date night or girls’ night out. I’ll be headed back with my husband in tow because we both love power tools.
Board and Brush
boardandbrush.com/gilbert
(480) 486-6151
538 S. Gilbert Rd., Gilbert
Related posts


Leave a Comment
You must be logged in to post a comment.
